This article describes a process of instrumenting an iOS application without a jailbroken device. Because of the absence of jailbreak in the latest versions of iOS and the requirement for testing applications on the latest versions of iOS, it is necessary to find ways of assessing iOS applications in non-jailbroken environments. In this post we will show the steps we need to follow to configure our environment, re-sign IPA files in order to access the application’s information after being deployed and instrument the binary to trace functions and/or modify its behaviour.
Note: The tools we will use are macOS-based hence an Apple Mac with macOS and XCode 7 is required for the entire process.
Configure the Environment
Create a developer profile
The first step is creating a developer profile from Xcode. This will allow us to generate signing identities and provision files. Since Xcode 7, it is possible to create free developer profiles. To do so, first open the Xcode settings window and go to the Accounts tab as shown below:
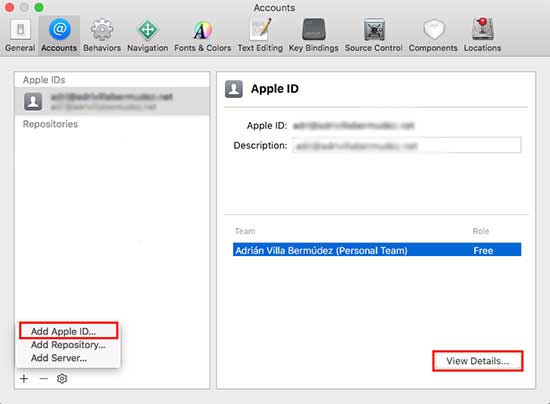
Once we have added an Apple ID, the next step is to create the signing identities from the “View details…” option. For the purpose of this guide, the only signing identity required will be iOS Development. Click on the “Create” button and, after the identity has been created, click on the “Done” button to finish the operation.
Create provisioning file and deploy developer profile
Once the developer profile has been created, the next step is to generate a provision profile file and deploy it to the iOS device. A provisioning profile is a file needed in all iOS applications that to satisfy almost each security check an application made before running, e.g. check if the certificate used for signing the app is valid, check the AppleID, verify the entitlements (permissions) an application request, etc.
We need to generate a provisioning file with our developer profile because the re-signing process (see later) will substitute the original file with our provision file that contains our AppleID and our signing certificate. Doing this, we will indicate to the device that the application is developed by us, allowing us access to the application container, the logs, etc.
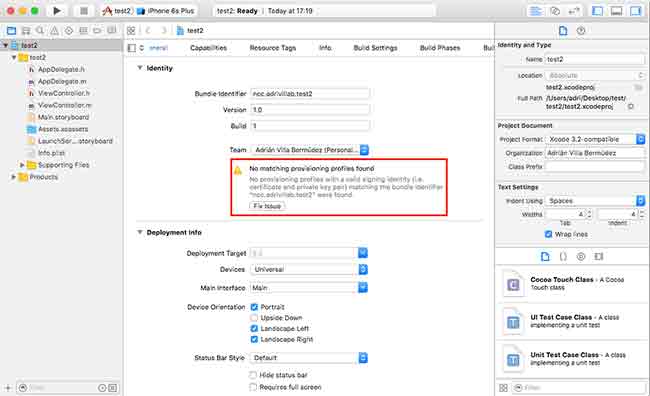
To do this, create an empty iOS application project, fix the provision profile issue (as per the image below), and deploy it to the device.
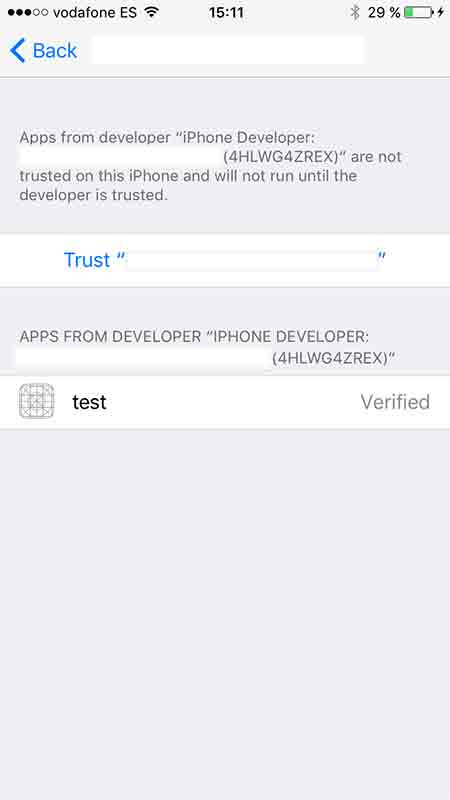
After deploying the profile, navigate to “General settings -> Profile” and accept the developer profile
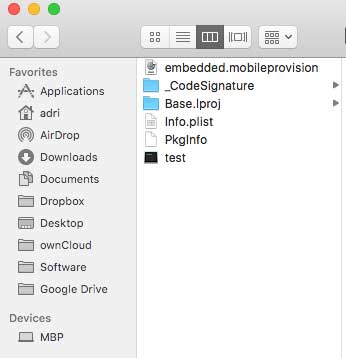
To obtain the “embedded.mobileprovision” file from the empty project created, first find the application container and then extract the file from it. The location of the container can be obtained from the “Identity and type” menu of the generated file within Xcode.
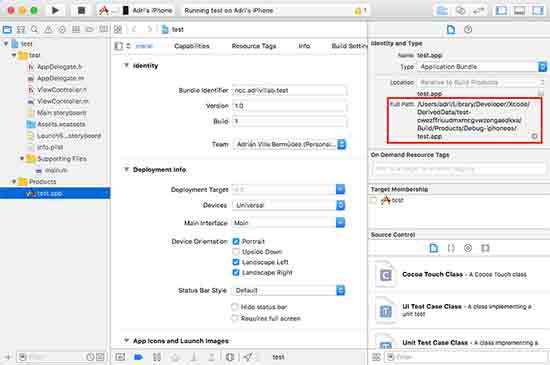
Once located, open the container folder and copy the file to a safe location.
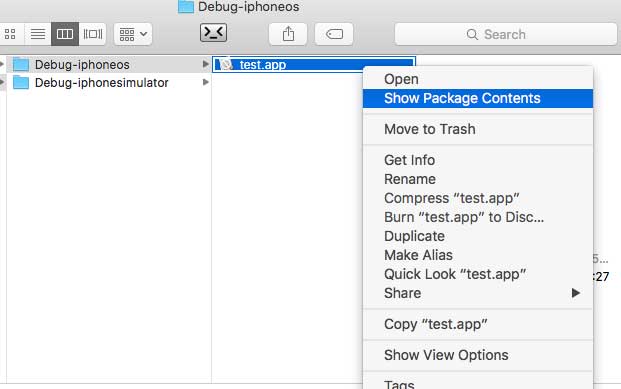
1 Re-sign IPA File
The iOS side loading app deployment process forces signing of every application with a developer certificate. After the application has been deployed a developer can then access the container folder or see the log debug messages on a non-jailbroken device. Therefore, in order to properly assess an application in a non-jailbroken device, it is necessary to re-sign the application with a developer certificate under our control before installing the application.
The process to re-sign an application involves several steps:
1. Re-sign the application binary and the libraries
2. Insert a new provision file
3. Fix the entitlements and the plist file
In order to speed up this process, a tool developed by Sergi Alvarez (@pancake), from NowSecure, called node-applesign (https://github.com/nowsecure/node-applesign), can be used.
Before using node-applesign for the first time, it is necessary to install node.js and the project’s dependencies. After that, the repository can be either cloned or downloaded, and finally we can execute the “ipa-resign.js” file. To re-sign an application with this tool there are several elements required:
– a developer identity hash-id;
– the path of the provision file; and
– the path of the IPA file.
The identity hash-id can be obtained using the node-applesign tool, specifying the -L flag, or with the security command tool:
$ ./ipa-resign.js -L

$ security find-identity -v -p codesigning
After selecting the correct identity, use the tool to re-sign the IPA. The following command re-signs an IPA file, replacing the original file, in order to allow us find easily our application on the phone.
$ ./ipa-resign.js -r -i 23CE9621AA7324F4E89481C6630591603A2ACD5E -m

~/pentest/iOS/myprovision.mobileprovision ~/pentest/iOS/test.ipa
If the process finishes successfully, the application can then be deployed using the Device Xcode tool, or preferably, using the ios-deploy command line tool.
Note: If the process terminates with the message “Error: This IPA is encrypted”, an additional step will be required to decrypt the binary using a Jailbroken device and an app such as Clutch.
2 Binary Instrumentation
At this point it should be possible to modify IPA files, before being deployed, in order to insert new resources as libraries. For this purpose Frida (http://www.frida.re/) will be used to instrument the binary and analyse the application.
Frida, as described by its documentation, “is a dynamic code instrumentation toolkit. It lets you inject snippets of JavaScript into native apps on Windows, Mac, Linux, iOS and Android. Frida also provides you with some simple tools built on top of the Frida API. These can be used as-is, tweaked to your needs, or serve as examples of how to use the API”.
Frida provides a dynamic library called “FridaGadget.dylib” that can be used to instrument newly developed applications on a non-jailbroken device. To do so, it is necessary to insert the library as a new project’s resource of the application. Additionally, it is also possible to use this library with an existing compiled application, which is our current scenario, just by modifying the binary and inserting a new load command.
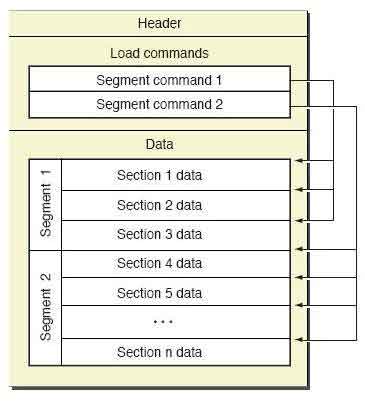
Before continuing, it is necessary to have at least a small understanding of the binary structure of an iOS application. iOS applications use a binary format called Mach-O, short for Match Object file format, which is a substitute to the a.out (assembler output) file format. Mach-O is used by most systems based on the Mach kernel, such as macOS (previously known as OSX) and iOS.
The Mach-O (iOS binary format) binary structure is divided into several sections. The header contains general information about the binary: byte order (magic number), CPU type, amount of load commands, etc. The load commands section is like a table of contents of the binary: it describes the position of the segments, symbols table, dynamic symbols table etc. Each load command includes meta-information, such as type of command, its name, position in a binary, etc. The data section contains the application code and the data, such as symbol tables, dynamic symbol tables, etc.
The process to insert a new library involves multiple steps:
1. Insert the library to the application container
2. Insert the load command on the load commands section of the binary
3. Increment the load command counter on the header section
4. Increase the size binary number on the header section
Again, in order to speed up and facilitate this process, a tool called insert_dylib (https://github.com/Tyilo/insert_dylib) will be used. First, clone or download the repository, open it with Xcode, and compile the tool. Now that the environment and the tools have been prepared and configured, it is possible to start instrumentation of the binary.
The following steps need to be completed in order to start the instrumentation:
1. Decompress the IPA file and copy inside the application container (at the same level as the binary) the FridaGadget.dylib file:
$ cd Payload/Test.app/

$ curl -O https://build.frida.re/frida/ios/lib/FridaGadget.dylib
2. Modify the binary to insert the load command with the insert_dylib tool. It is necessary to specify the strip-codesign option to ensure the re-signing process works fine later on:
$ ./insert_dylib --strip-codesig --inplace  @executable_path/FridaGadget.dylib

Payload/Test.app/Test
3. Re-sign the IPA file. This will require compressing the “Payload” folder into an IPA file, and then using the ipa-resign tool, as explained before.
4. Due to a feature of the ios-deploy tool, it is necessary to decompress the IPA file again, otherwise, if we deploy the IPA file instead, the application container will throw a signature error.
5. Now the application can be deployed using ios-deploy in debugging mode. The application must be executed in debugging mode as we will execute unsigned by Apple.
$ ios-deploy  --bundle Payload/Test.app --id

92c8551cb5486d13d35140a597318cb3a3926807 -d
6. Once the application is started, the dynamic library starts the Frida server. Wait until the Frida server starts messaging on the debugging console.
7. Once the Frida server is listening on the device, it is possible to start interacting with the process using the Frida toolbox. The first step is to verify if the gadget was deployed correctly using, for example, frida-ps.
$ frida-ps -Uai
8. At this point the FridaGadget is waiting for an input, which allows for instrumentation. Due to a problem with the non-jailbroken devices, it is necessary to spawn a new process and apply the instrumentation on this new process, instead of applying it on the original. For this guide, we will use the scripts available on the project frida-scripts (https://github.com/as0ler/frida-scripts) that allows the tracking of known functions. If we want, we could develop our own scripts, instrumenting concrete functions.
$ python frida-scripts/hooker.py -S re.frida.Gadget
9. After this, the execution of the application can be resumed. To do so, use the frida command, which allow us to interact with the Frida server.
$ frida -U -f re.frida.Gadget

      [USB::iPhone::[re.frida.Gadget]] -> %resume
Once all the steps have been completed, it should be possible to see, on the hooker.py output messages, the calls to the tracked APIs and the arguments sent to the functions.
I hope you enjoyed the post. In terms of future work I am currently working on a tool/script that will facilitate the entire process.
I would like to thank Sergi Martinez (@zlowram) for inspiring me on this technique.
Adrian Villa (@AdriVillaB)
Written by Adrian Villa
First published on 12/10/16