Introduction
As security consultants we often come across situations where we have access to an RDP server that has been locked down fairly well by an administrator, which generally inhibits our ability to test the target.
This blog looks at what a tester can do given the following scenario:
- Tester has valid RDP credentials – these need to be on the server so that’s a given.
- Application white listing has not been implemented – Very few companies implement whitelisting of applications, despite most security consultants recommending it.
- Tester has a location they can write to – even if it’s just the temporary directory.
- Tester has access to some form of texteditor – how dangerous could notepad.exe be?
RDP makes use of a number of static virtual channels which are created during the initial connection, these are used for transferring data for the keyboard, the GUI, the clipboard and a number of other items. When clipboard redirection is disabled, it is the associated virtual channel that is actually disabled.
There are also dynamic virtual channels which can be created after the connection is initiated, these are generally used for adding support for hardware or extending the functionality of RDP.
In this blog we discuss how to abuse these virtual channels in order to get bidirectional file transfer when the RDP clipboard is disabled, and how to bypass network egress filtering by relaying the network traffic via the RDP session.
This blog is broken down in to the following sections discussing three related tools:
- Loki and its use in uploading files, to gain an initial foothold onto the server.
- Sleipnir and its use in gaining bi-directional file transfer, allowing easier transfer of additional tools.
- Fenrir and its use in bypassing network egress filtering and getting a meterpreter reverse_http shell back by redirecting traffic down a dynamic RDP channel.
These tools are more a proof of concept rather than a fully-fledged suite, as such they are a little rough around the edges and do not always error gracefully.
Loki
Loki has a built-in RDP client and uses the tester’s ability to manually type out a file in notepad or some other text editor. The key issue with using notepad is that it is not possible to type out binary data.
To combat this we can use a number of encodings such as hex or base 64, the problem with this is that we need a way of decoding them at the other end. Luckily Internet Explorer has a built in base64 decoder used for MIME HTML (.mht) files.
Loki will take a given file, convert it to base64 and using input simulator (https://inputsimulator.codeplex.com/) will type out the .mht file to the text editor in focus.
Using Loki
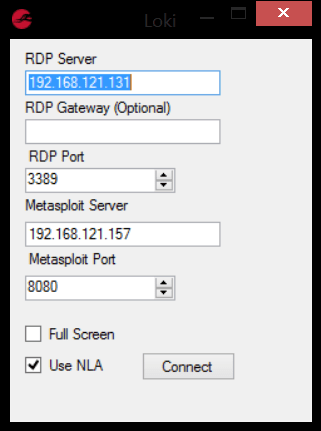
The initial Loki interface is pretty straight forward and consists of five input fields and two tick boxes. The “RDP Server” and “RDP Port” are required fields, these are used to connect to the RDP server. In the case of an RDP Gate being in place the “RDP Gateway” field can be used to specify the address.
The “Metasploit Server” and “Metasploit Port” fields are for use with Fenrir and will be explained later.
The NLA tick box toggles whether the client uses Network Level Authentication and the Full Screen tick box sets the client to full screen mode.
Once connected the interface for using Loki is even simpler as it uses a single drop down menu titled “Loki” with one option – send file, which transmits the file using send keys.
The first thing to do is get a text editor open (ensuring it is in focus), and select Loki -> Send File (sendkeys). Loki will then ask two questions:
- Is the network particularly slow? If yes is selected then the time between key presses is set to 10ms, if no is selected then it uses 3ms instead.
- Is the remote browser Internet Explorer? If yes is selected then the file is sent as part of an mht file, if no is selected then the file is sent as part of an embedded image as other browsers do not support the mht format.
If the remote browser is Internet Explorer then the format seen will be mht:
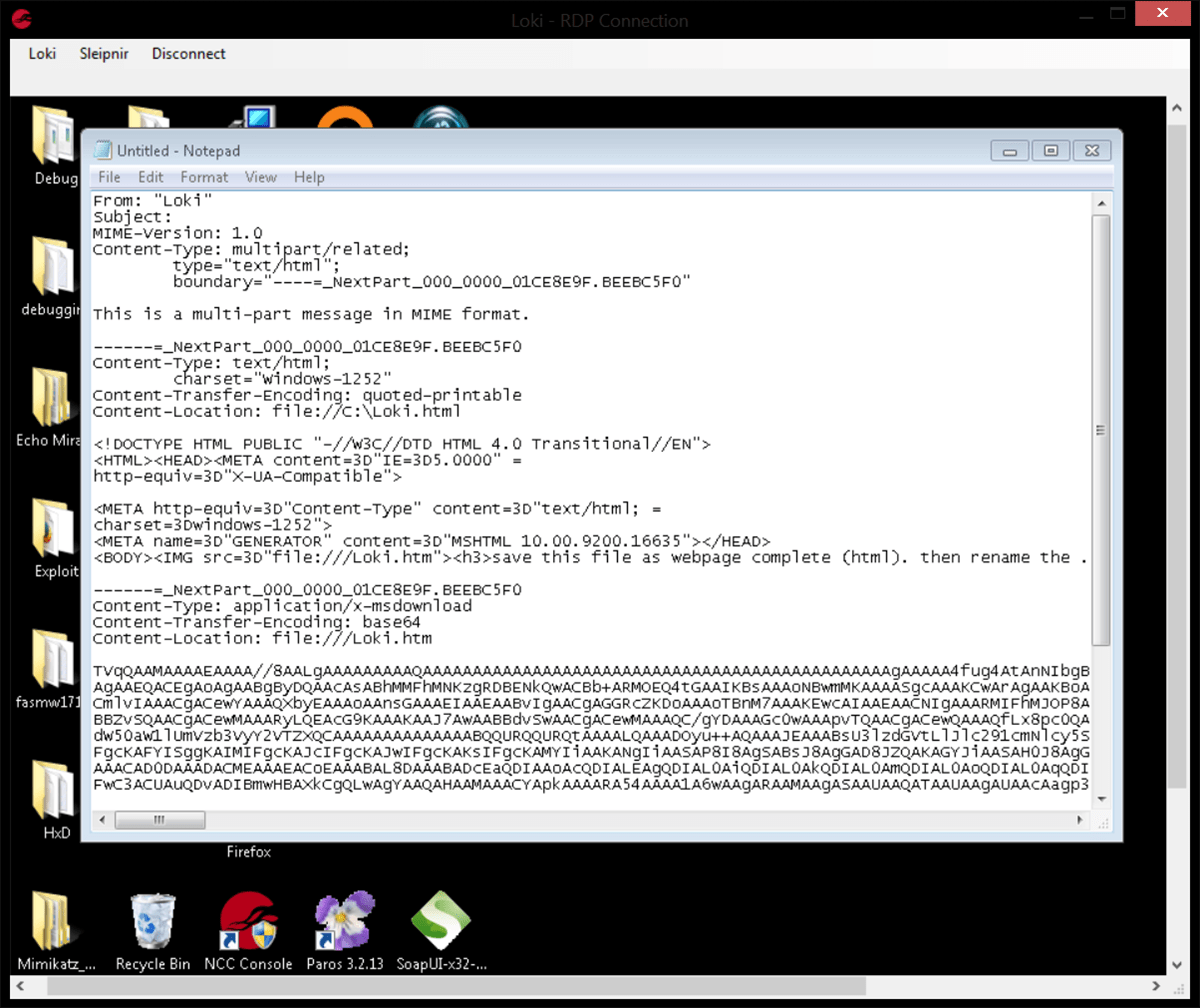
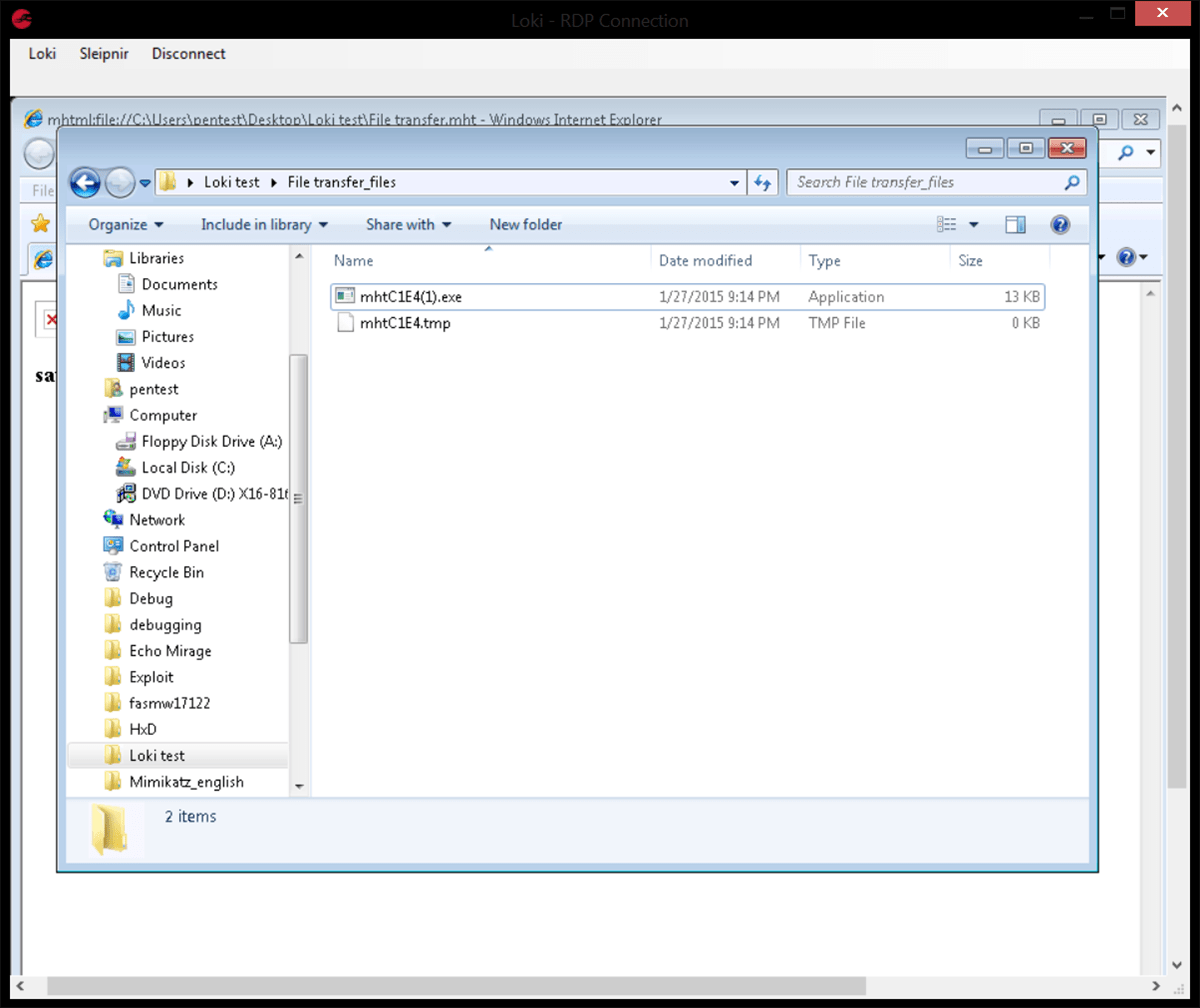
Once completed the file should be saved as filename.mht and opened with IE, then saved again as “web page, complete” this will create a web page and a directory containing two randomly named tmp files.
The extension of the larger of these two files should be changed to that of the transferred file, in this example it was an executable that was transferred, so the file becomes mhtC1E4(1).exe
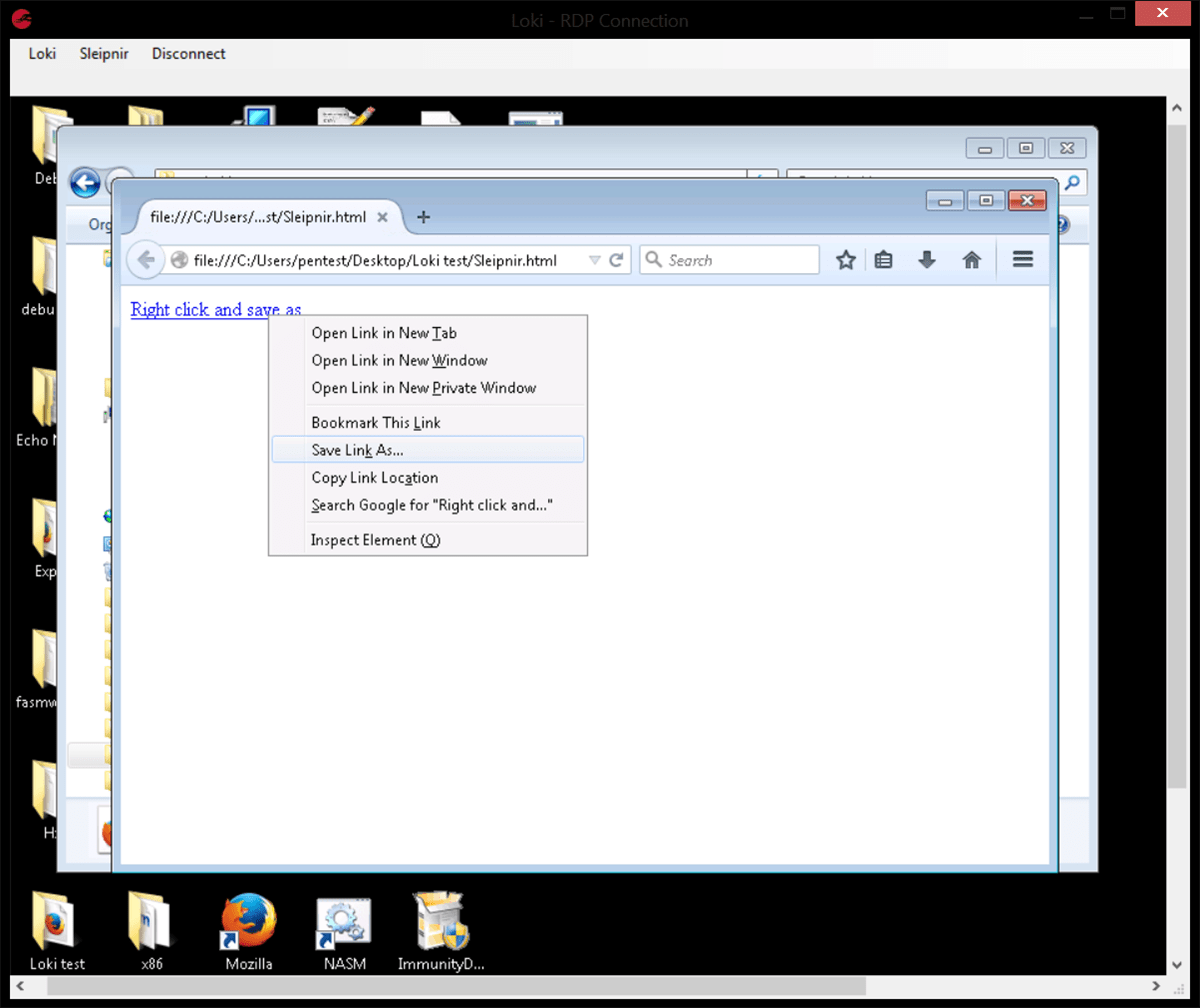
If the remote browser is not Internet Explorer then the format seen will be that of an image embedded in an HTML page.

This should then be saved as an HTML page and opened with whichever browser is installed. Right click on the link and select “save as” and enter the correct file name, in this case sleipnir.exe (note that Internet Explorer does not allow this step, hence the two different methods).
At this stage we have a file upload ability, however it is very slow taking in excessive of 45 minutes to transfer 1Mb of data, the chance of the file becoming corrupt during transfer can be quite high with slow networks and the machine cannot be used while the transfer is occurring.
This is where one of Loki’s sons, Sleipnir, comes in to combat these issues.
Sleipnir
Sleipnir is a small executable designed for quick upload via the send keys method, hence the lack of an icon (and error checking). Sleipnir was developed to provide two-way file transfers at a much quicker pace than the send keys method could provide by using virtual channels.
A virtual channel needs to be created on the server side and then connected to from the client side, any data passed through these channels is done so via the RDP connection. The .NET function AxMsRdpClient7NotSafeForScripting.SendOnVirtualChannel can only send string data of a limited length, for this reason the files are carved in to 1k chunks and base64 encoded on one side and then then base64 decoded into a stream on the other side.
Using Sleipnir
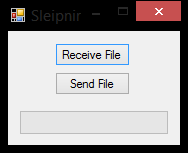
Sleipnir consists of a form with a progress bar and two buttons:
- Receive File – sets Sleipnir to listen for events on the virtual channel Loki1
- Send File – allows the user to select a file on the RDP desktop to send back to the client
To send a file from the local host to the RDP server the user must click the Receive File button on Sleipnir and then click “Sleipnir” -> “Send File On Virtual Channel”. Within the Loki interface, the user is then prompted to select a file.
Sleipnir then reads the file in 1KB at a time, base64 encodes it and sends it to the virtual channel. An event handler within Sleipnir detects the write, decodes it and writes it to a file. The file is created in the same directory as Sleipnir is located and retains its original file name.
To send a file from the RDP server back to the client simply click the Send File button select a file and then wait for the transfer to end.
With some of the larger files there is a little delay in the update of the progress bar, and it may appear to have crashed when in fact it is working. While it should be able to transfer files of any size I have only tested with files of up to 250MB, which it handled perfectly well (although the progress bar did not update, you just have to wait for the message box saying it transferred ok). Throughput averaged about 800Kb/s during testing.
Fenrir
If it is possible to take any type of file, convert it to a string, send it in either direction and then rebuild it, it should be possible to do the same with network traffic.
One of my colleagues said, “You know what would be really cool? If you could send a meterpreter shell over the virtual channel”, and so Fenrir was created to prove this could be done, however it is still in its infancy and only allows the user to port forward the reverse_http shell. My long term goal here will be to create a fully-fledged SOCKS proxy, from Loki to Fenrir and vice versa.
Using Fenrir
Again Fenrir is very simple to use, we use the “Metasploit Server” and “Metasploit Port” fields on Loki’s initial interface to specify the location of the user’s Metasploit listener, and enter the port number you want to listen on the RDP server (default is 3000).
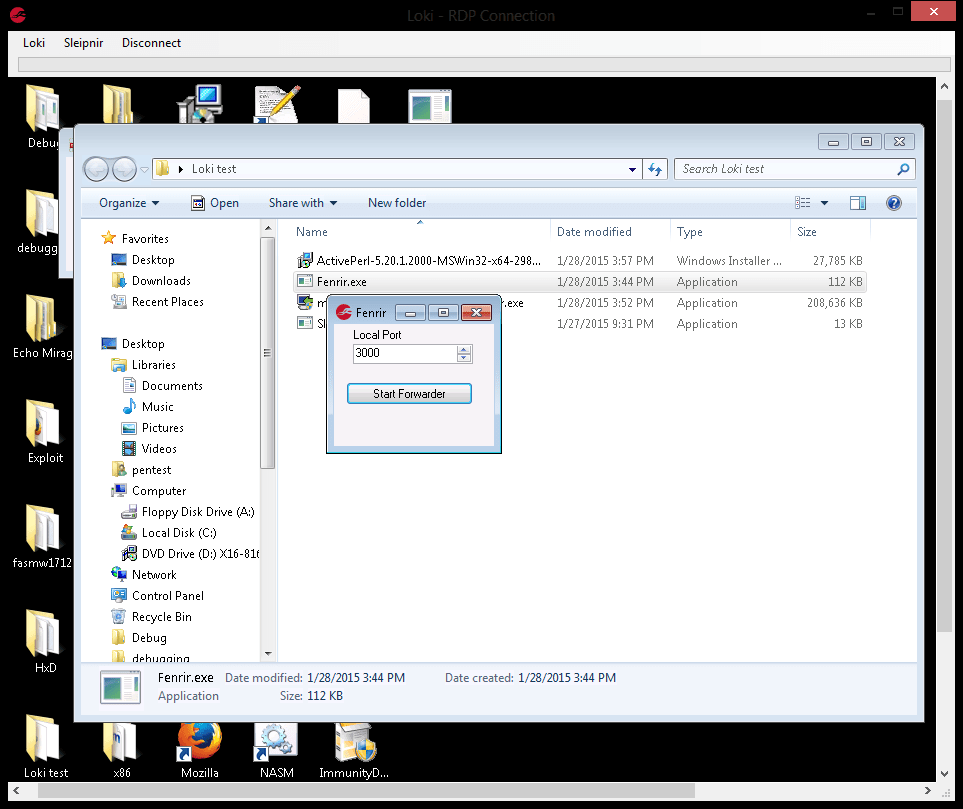
Once the “Start Forwarder” button is clicked Fenrir checks if the port is available and if so opens a listening port on 127.0.0.1.
Any traffic sent to this port is forwarded on to the server and port that the user specified in the initial Loki interface.
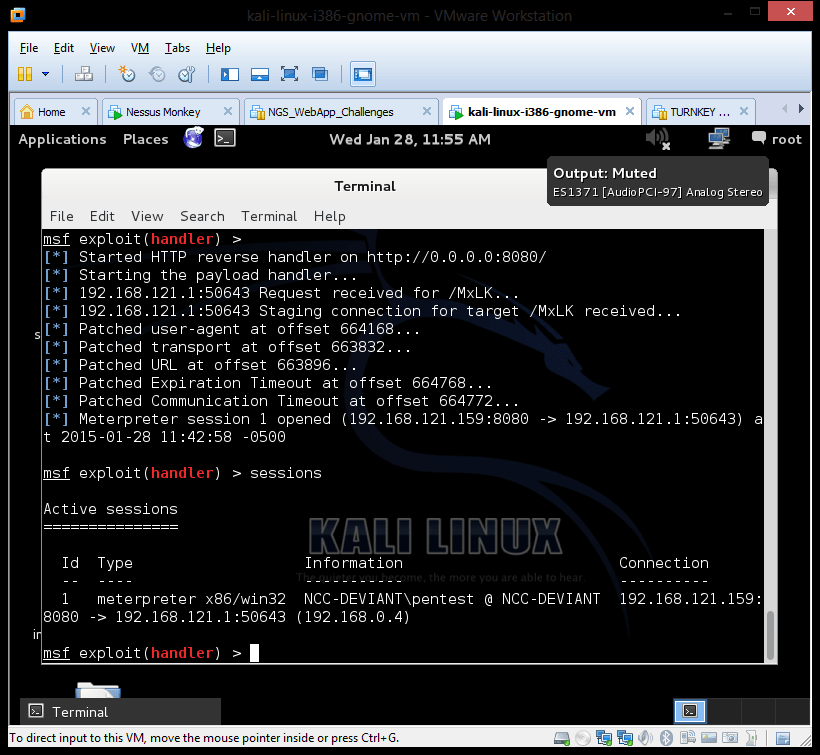
As a proof of concept a meterpreter reverse_http payload was configured with the following options:
- LHOST = 127.0.0.1
- LPORT = 3000
The RDP server is a VM with an IP address of 192.168.0.4
The msflistener is a VM with an IP address of 192.168.121.159
My host machine Running Loki is 192.168.0.1
As can be seen from the screen shot below the reverse shell has been established from the msflistener to my host address:
Conclusion
As we have seen so far a user can abuse the RDP virtual channels to transfer files and defeat network egress protections. Currently I am unaware of any method to disable virtual channels within the RDP protocol and the only guaranteed method to stop this ability is to implement a whitelist of allowed applications.
The technique described here also has further security impacts as the file transfer and the network traffic is hidden within the encrypted RDP tunnel, as such a forensics investigation is unlikely to be able to detect either the reverse shell or the movement of files.
Further to what has already been described, it is feasible to implement a socks proxy on Loki to enable scanning/testing of servers sat behind a Windows bastion host.
The techniques described here are also applicable to Citrix servers, and the client could be written using the Citrix virtual channel SDK.
References and Further Reading
- https://github.com/nccgroup/loki
- https://github.com/nccgroup/Sleipnir
- https://github.com/nccgroup/Fenrir
- http://blogs.msdn.com/b/rds/archive/2007/09/20/dynamic-virtual-channels.aspx
- https://inputsimulator.codeplex.com
- http://www.citrix.com/downloads/citrix-receiver/sdks/virtual-channel-sdk.html
- http://en.wikipedia.org/wiki/MHTML
Published date: 24 February 2015
Written by: David Spencer